Repairing models
by Ora Lassila / So Many Aircraft
Models break. this is an inevitability, thanks to various unforeseen events. For example, models may break in transit when traveling to/from a model show. Little kids and cats may get into your model collection. Earthquakes may shake your display case. Many possibilities...
Some modelers choose to abandon damaged models. Sometimes it depends on the level of damage, but my own feeling is that if there is a possibility of restoring a model that I originally spent a lot of effort on building, I should try to repair it. Many modelers have a "Shelf of Doom" where unfinished model projects languish. After I was faced with a major destructive event, I simply decided that in addition to the SoD, I would also have a "Salvage Yard".
Note, also, that sometimes you may choose to "upgrade" an existing model even if it is not broken. Maybe you will feel that there are details you could have done better, or that you made a mistake with something. Similar techniques can be used there, too.

The aftermath of a catastrophic, destructive event.
Preparations
Repairing is easier if you prepare in advance; that is, before your models break. This basically includes the following:
- During your (original) project: Take notes about your project, your build progress, your research findings, essentially any details you will forget soon after your project is completed. Particularly, write down which paints you used, and if you had to mix paints, the "recipes" that will let you reproduce the same colors. I cannot stress enough the importance of note-taking. I also take photos of completed models, and compose Web pages that combine these and all my notes.
- Upon completion of your (original) project: Save leftover parts and supplies; most importantly, save any paints you mixed (and label the jars properly). Having some leftover paint saves a tremendous amount of effort and saves you from the headache of having to match colors. Also, save any collateral artwork you may have prepared for decals or for cutting. You may even want to save the instructions sheets of the kit(s) you used.
Repair supplies
So far, I have found that CA glue ("superglue"), Mr.Surfacer, and fine wet-sanding paper are your best friends when repairing models. This may sound rather obvious, but it is surprising how much these simple supplies let you get done.
For CA glue, I use small micro-applicators: I drop some glue on an old business card (I have boxes and boxes of those), and use the applicator to spread the glue onto surfaces to be glued. For Mr.Surfacer, I use inexpensive, disposable make-up bruses, this saves me from having to clean up a brush every time.
Other things that are good to have handy include liquid plastic cement, putty, tweezers, X-Acto knives, generally all the tools and supplies that you would use normally when building models. This includes a selection of Evergreen (or comparable) styrene stock: rods, strips, sheets, etc.
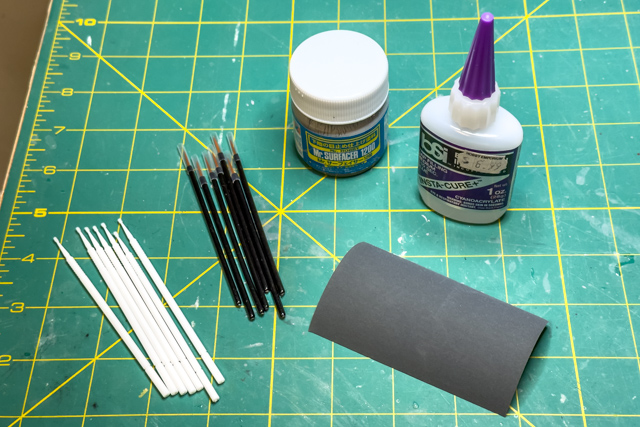
My good friends.
Repair techniques
Most of what in this article might be called "repair techniques" are actually just regular modeling techniques, wityh a few caveats:
- Repairs are highly localized. This means you may need to fill and sand a seam while avoiding messing with decals that are close by.
- Repairs may need additional structural support, since the original engineering details of the kit may no longer be available.
Sometimes structural repair requires additional strengthening. This typically happens if the original structural engineering of the kit has been damaged (e.g., tabs/slots for wings). In cases like this you may have to fashion your own structural support, such as actual wing spars or strips glued on the inside of a fuselage.
Case study: Repairing a Hawker Tempest target tug
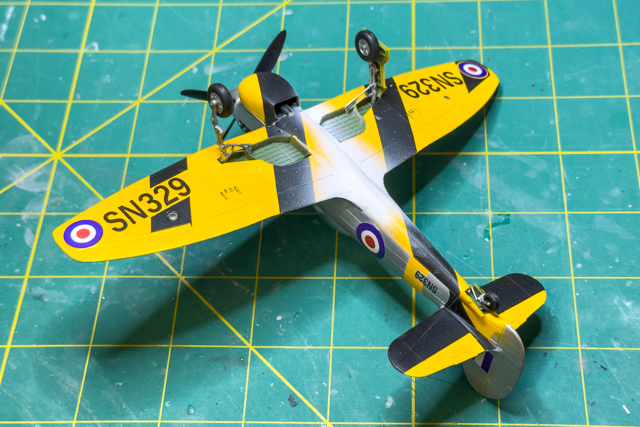
Some of the techniques are illustrated in my project to repair a moderately damaged model of the Hawker Tempest TT.Mk.V. Wings had come off (in the kit the lower surface of the wings is a single part, this one had cracked). Underwing equipment had come loose, the winch pod turbine blades had broken off, the ventral mast for the wires that protect the tail had snapped, and the canopy had also broken off. Most of the landing gear doors had also come loose.
The biggest structural issue was to connect the wings in a way that would align then properly and provide some strength. I decided to insert two styrene strips inside the wing, much like the spars of the original aircraft (see photos below). These aligned the wings perfectly, and allowed the whole wing assembly to be glued to the fuselage.
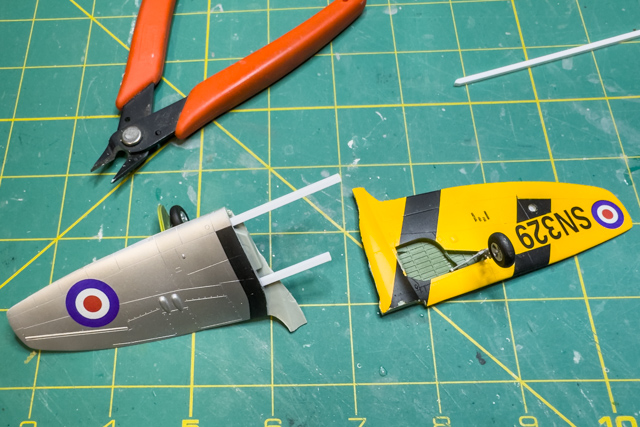
Styrene strips inserted inside the damaged wing of author's Hawker Tempest to better align the parts when reattached.
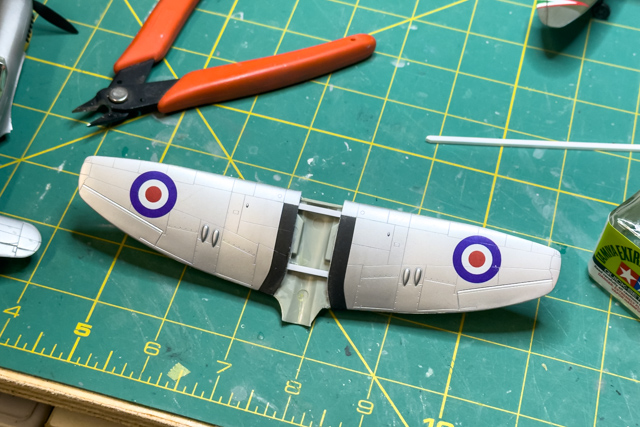
Repaired wings, properly aligned, ready to be attached to the fuselage.
Cracked seam filled and sanded.
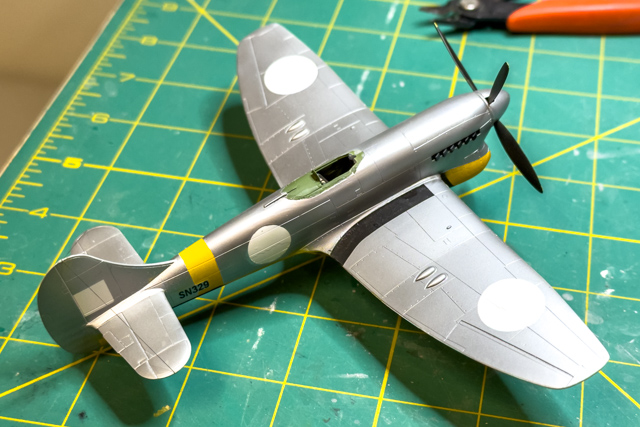
Primer sprayed to reveal flaws.
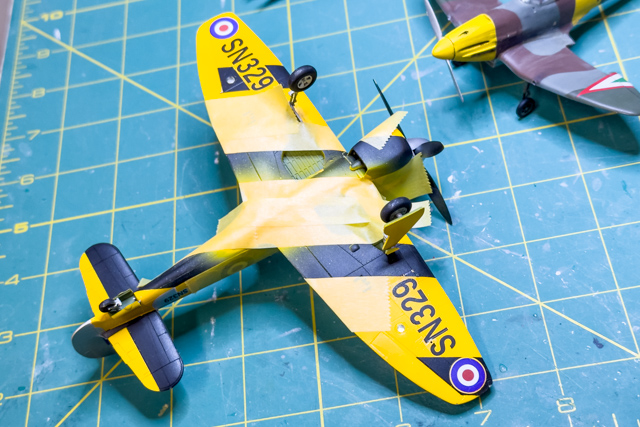
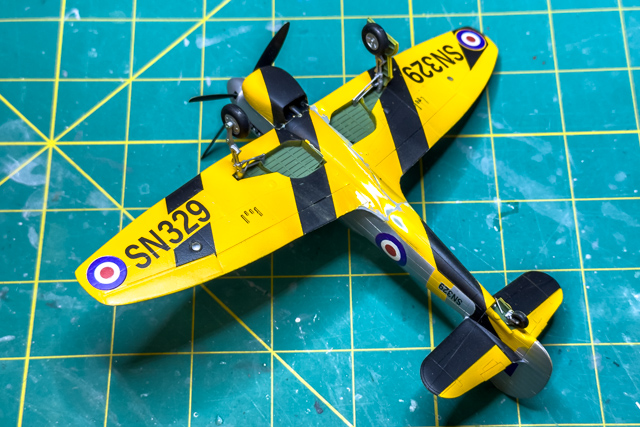
Masked for retouching the black stripes.
Decals stripped.